Blog
Making instructions
Added this week: a FAQ, some instruments (more to come soon!), schematics / making instructions:

... and a ready-to-use image file (containing the OS/software, that you put on a microSD card and insert into the Raspberry Pi).
Tech article: how to have a very fast boot time with Raspberry Pi
First of all, if you're into music, and not especially interested in programming / Linux, etc., don't read this article.
Is it possible to have your Raspberry Pi app running less than 8 seconds after you plugged the power cord? Or less than 3 seconds after the Linux boot has started?
Yes. Proof:

How to do that?
It's simple: you need systemd, the new boot management system in Linux, instead of the previous standard sysvinit. It has now become the new standard on recent distributions like Raspbian Jessie, ArchLinux, etc.
Here is how to create a service that will run as soon as possible.
Just create a file /etc/systemd/system/samplerbox.service containing:
[Unit]
Description=Starts SamplerBox
DefaultDependencies=false            # Very important! Without this line, the service
                                     # would wait until networking.service
                                     # has finished initialization. This could add 10
                                     # more seconds because of DHCP, IP attribution, etc.

[Service]
Type=simple
ExecStart=/root/SamplerBox/samplerbox.sh
WorkingDirectory=/root/SamplerBox/

[Install]
WantedBy=local-fs.target
and then do:
systemctl enable samplerboxOn next reboot, it will start!
Moreover, systemd has really great built-in tools to tune the boot time:
-
systemd-analyzewill print the boot time, -
systemd-analyze blamewill print the list of the most time-consuming services in decreasing order! Just tune the first listed-services, and you will solve 80% of your boot time problem. Another great example of the Pareto principle. systemd-analyze plot > plot.svg: this will display in a graphical way when all the services start. Really great. As it's a SVG file (you can view it in your browser), you can even CTRL+F and search where the relevant services are.
So, as a summary, if you want fast boot time on your RaspberryPi, first install a Raspbian Jessie distribution, or any other distribution using systemd. Then start the optimization with systemd-analyze!
Raspberry Fields Forever...
Here we are! Nearly ready to release version 1.0 of the source code and making instructions.
If everything goes well, 2015 May 31 will be the date of the first release!
In the meantime, here is a small video:
Playing piano:
SamplerBox performance
Last days, I have updated and optimized the audio engine. Result:
- 128 voices of polyphony without problem (why so many voices? it's useful when you play piano with sustain pedal for example)
- ~ 11 milliseconds latency (better than expected, finally similar to most profesionnal audio interfaces!)
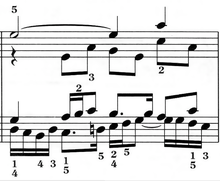
A bar from J.S. Bach's "Fugue No.17 in A flat", BWV 862,
from Das Wohltemperierte Clavier.
The definitive guide to MIDI IN with Raspberry Pi's GPIO
Do we need a USB MIDI interface to use MIDI with the Raspberry Pi? No!
Is it possible to have MIDI IN into Raspberry Pi's GPIO? Yes!
After all, MIDI is nothing else than serial connection at 31250 baud, so let's use the Pi's serial port.
Here is a working solution:
-
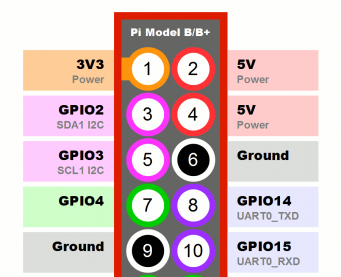
Build this cicuit (you need a 6N138 optoisolator, a few resistors, and a diode 1N4148):
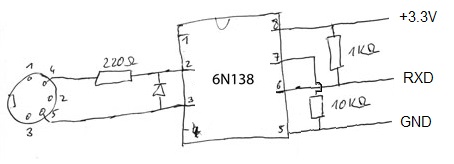
-
Connect GND to a GPIO pin #6, connect +3.3V to a GPIO pin #1, connect RXD to the GPIO pin #10!
-
Check your Linux kernel version with
uname -a. If it's 4.5 or higher, just add these three lines at the end of/boot/config.txtand go to step 4.enable_uart=1 dtoverlay=pi3-miniuart-bt dtoverlay=midi-uart0(
pi3-miniuart-btdisables the Bluetooth and changes the connection of GPIO pins #14 #15, see here)If you have an older version of Linux kernel (4.4 or lower), you have to add
bcm2708.uart_clock=3000000at the end of/boot/cmdline.txt, remove everything in this file related to ttyAMA0 (it would pollute the serial port input with console text), and add this at the end of/boot/config.txt:init_uart_clock=2441406 init_uart_baud=38400It's a hack (but it perfectly works!) allowing the Pi's serial port to run at 31250 baud, which would normally not be possible with UART clock of 3Mhz.
-
Reboot and run this Python code:
import serial ser = serial.Serial('/dev/ttyAMA0', baudrate=38400) message = [0, 0, 0] while True: i = 0 while i < 3: data = ord(ser.read(1)) # read a byte if data >> 7 != 0: i = 0 # status byte! this is the beginning of a midi message! message[i] = data i += 1 if i == 2 and message[0] >> 4 == 12: # program change: don't wait for a message[2] = 0 # third byte: it has only 2 bytes i = 3 messagetype = message[0] >> 4 messagechannel = (message[0] & 15) + 1 note = message[1] if len(message) > 1 else None velocity = message[2] if len(message) > 2 else None if messagetype == 9: # Note on print 'Note on' elif messagetype == 8: # Note off print 'Note off' elif messagetype == 12: # Program change print 'Program change' - That's it!
`
Note: the method described here is nothing really new. It's just the sum of various (sometimes difficult to find) informations found in lots of places over the internet, and some personal hacks (the Python code) to make it easy to use.
Note2: thanks to Damien for pointing the new method for Linux kernel >= 4.5.
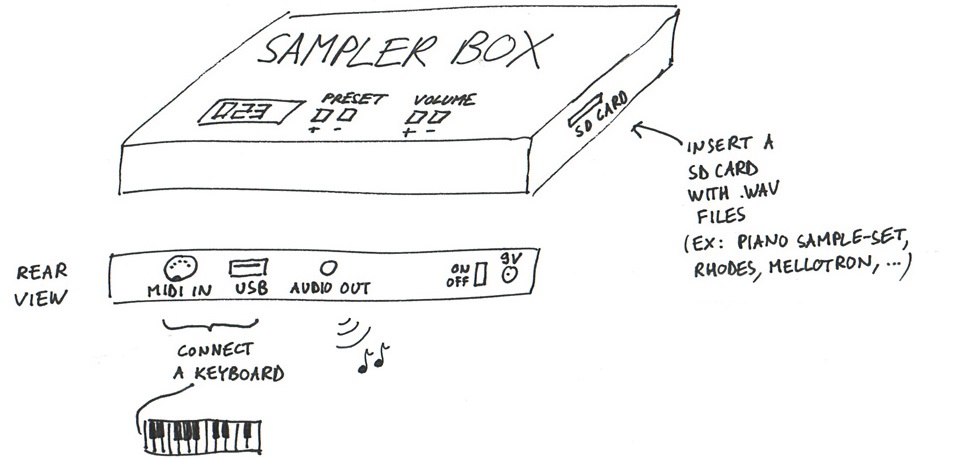
Sourcing components...
What's the most difficult and time-consuming task in this project? Coding the sampler software? No. Soldering and assembling all the components together? No. Designing the custom enclosure? No!
The answer is: sourcing the components.
A huge amount of time has been spent on finding the right components: which DAC (digital to analog converter, i.e. the device which converts 0s and 1s into real-life sound!) to choose, etc. ?
But the most difficult task was to find the right component to provide a SD card slot.
It looked simple at first sight:
-
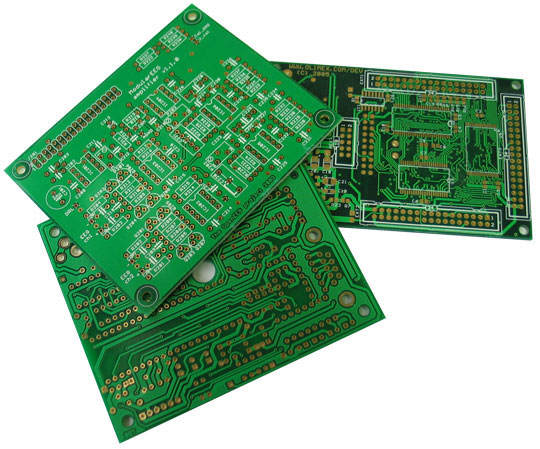
Why not use a 1$ SD card reader? Yes, but then, how to mount this on the internal PCB of the SamplerBox ? (what's a PCB? Answer here.) Not so easy.
- Why not use this ultra-classical component "SD card module", available in all online electronic shop?

The answer is simple: to interface this module with the RaspberryPi, we have to use the SPI interface (is there another solution using directly SDIO? If you do know, please let me know), which results in a very low transfer rate limit, around ~ 1.5 MB/sec. Loading a 200 MB instrument on a SamplerBox would require more than 2 minutes!
I've been looking for a solution for weeks, until someone pointed me today to this part:

I cross my fingers until this component arrives, to see if it will work as expected!
Another prototype...
Here is how it currently looks like. Some videos soon...
9 parts that I finally won't use
When designing such an instrument, you do lots of tests, and finally you end up using only one half of the components you bought. Here is a small list of 9 components I finally won't use:
-
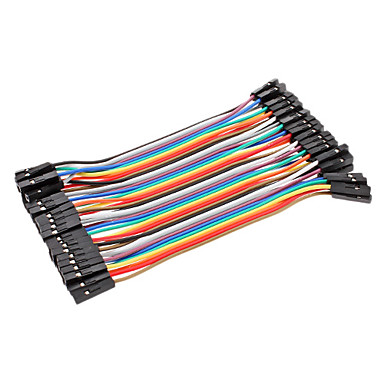
I won't try to hack an existing USB cable again:
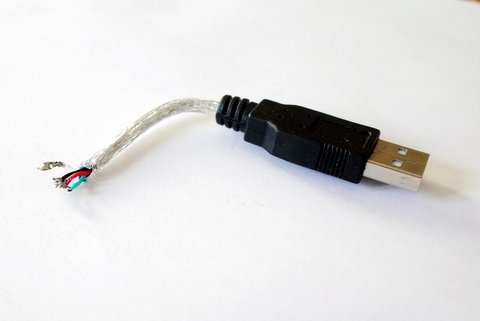
I'm probably not so good at stripping cables, but wires in USB cables are so thin that even if you manage to strip them, at the end, you'll have wires that are so thin that they would break easily. I lost some time trying to do it, it was such a mess! Let's use a 1€ USB PCB connector + Dupont cables. 10 times better and more robust.
-
A panel-mount USB socket (~ 10€):

As I'm using a PCB for I/O board, this part won't be needed anymore. Having to screw such a socket to the enclosure is finally probably a bad idea. A PCB-mounted 1€-USB-socket is finally better.
-
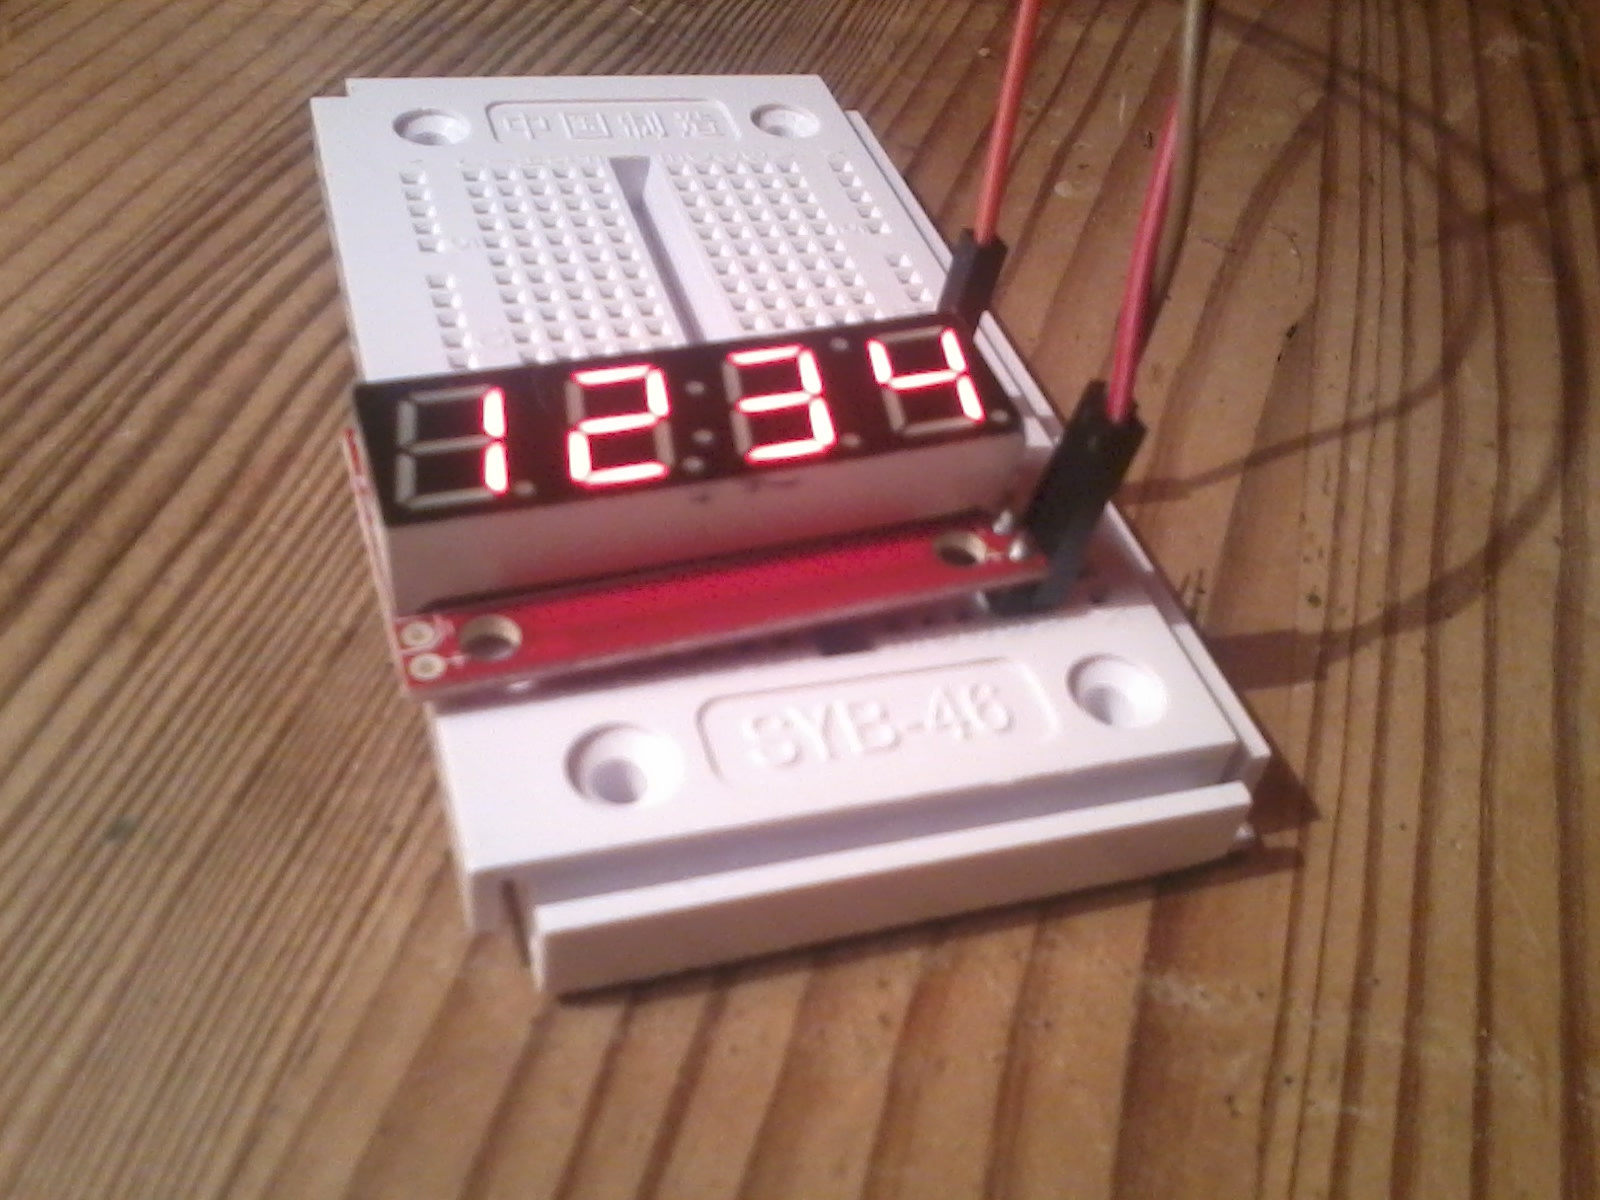
A plain 7-segment display without micro-controller:
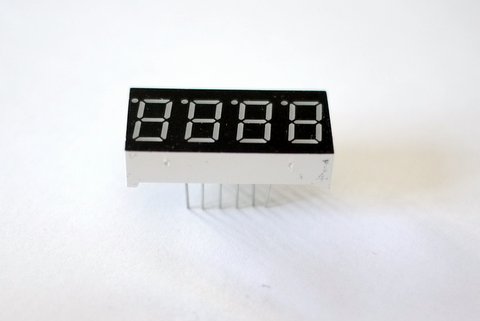
They are cheap (1 or 2€ on ebay) but they would require to be connected to the Pi with 12 pins, and would require a constant running task to update (maybe 60 times per second!) the display. Some people tried (I don't find the link anymore) and it used at least 10% of the Raspberry Pi's CPU. Bad idea. It's better to use this 7-segment PCB. A little bit more expensive, but it's easier to use it.
-
This jack-power plug won't be needed:

Powering the SamplerBox is now done with a classical 5V phone charger with micro USB.
-
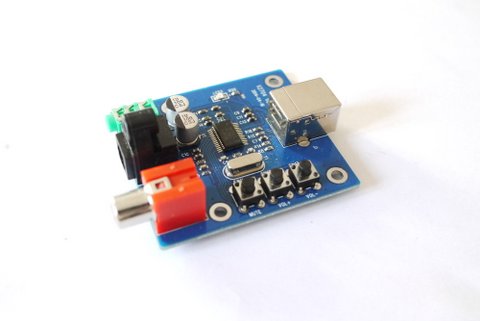
A hacked MIDI/USB interface:
Not needed anymore because we can connect directly the MIDI input to the Raspberry Pi's serial port (UART RX pin), with a little bit of work (configuring the data baud rate, etc.).
-
4 AA batteries holder:
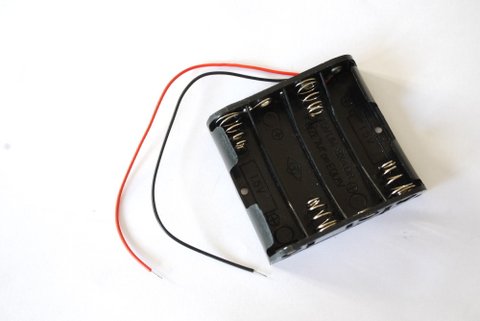
This might be too big to fit in the enclosure. Currently looking for a smaller and/or better solution.
-
Several enclosures:
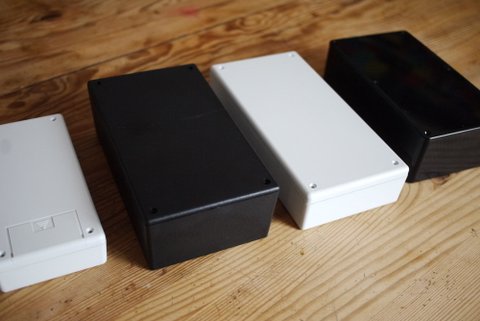
Using these enclosures would have been cool, but we would have needed to laser-cut the holes anyway. So if laser-cutting is needed anyway, why not using directly custom made enclosures? One less thing to buy: enclosure.
-
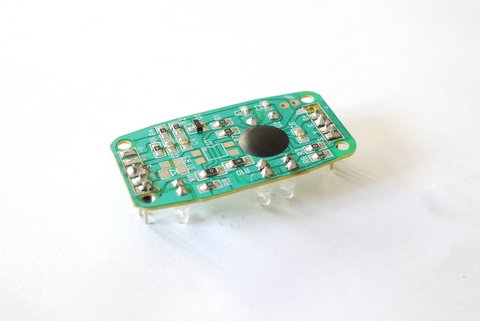
This DAC is really excellent (wonderful sound quality and cheap ~10€) but it won't be needed...
... simply because I have found this DAC which is a) based on the same PCM2704 chip (so same sound quality), b) cheaper (6€), c) smaller!
-
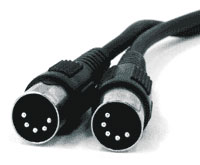
I know it'll sound weird but it was quite hard to find very short USB cable:
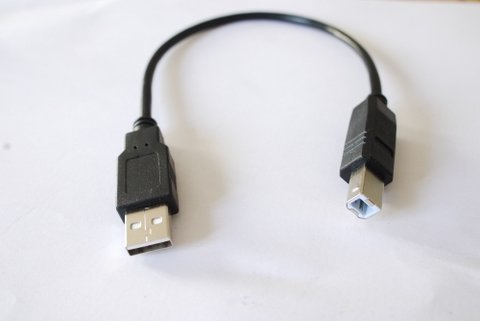
Not needed since I have now built shorter cables myself.
Custom made enclosure
Two options are possible:
-
Either we use plastic enclosures from manufacturers such as Hammond, Velleman, etc. but we'll still have to laser-cut the holes for the 7-segment display, buttons, power & audio jack, etc. anyway,
- Or we build our own enclosures, made of laser-cut birchwood!
The easier will probably be the second solution, thanks to the wonderful Labomedia (FabLab / HackerSpace in Orleans, France).
Here is how the prototypes currently look like:
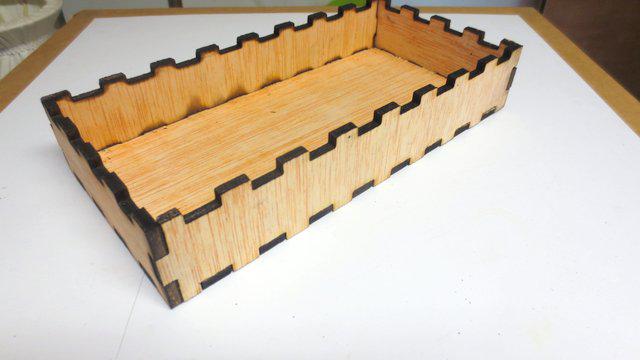
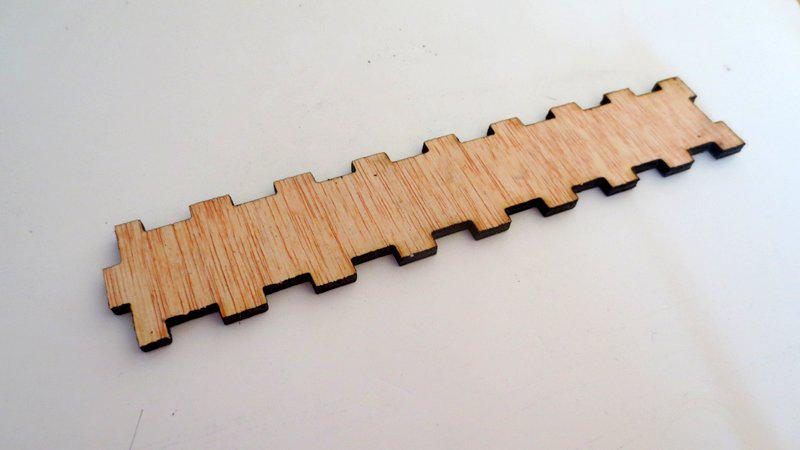
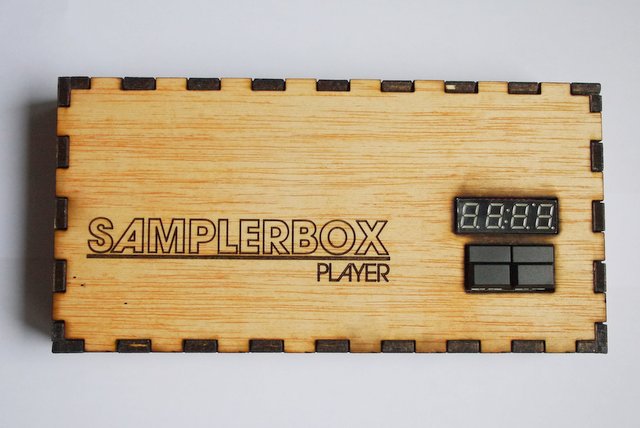
Laser!
In progress...
After a few days of work, here's what we currently have:
.jpg)
Done the last weeks:
-
Installed Arch Linux instead of Raspbian Wheezy : the boot time goes from 30 seconds to ... 10 seconds, waw! (In fact, the reason for this speed boost is not really ArchLinux vs. Raspbian, but the use of the new
systemdboot management system; it is now available by default on Raspbian Jessie) -
the Digitast buttons (for Preset +, Preset -) now work
- After a few unsucessful attempts, the 7-segment display now works!